Plan the room before cutting anything
Choose one blank wall that is visible from the party area but does not need to hold food, coats or a television. Measure the available width and check the wall finish in a hidden spot before using painter’s tape or removable adhesive. Keep paper decorations away from candles, heaters, hot bulbs, cooking surfaces and vents.
The quantities below create one bat swarm, one three-lantern cluster and three streamer ghosts. They are deliberately unlit. The warm color comes from the paper and the room around it, so no bulb or flame needs to sit inside the lanterns.
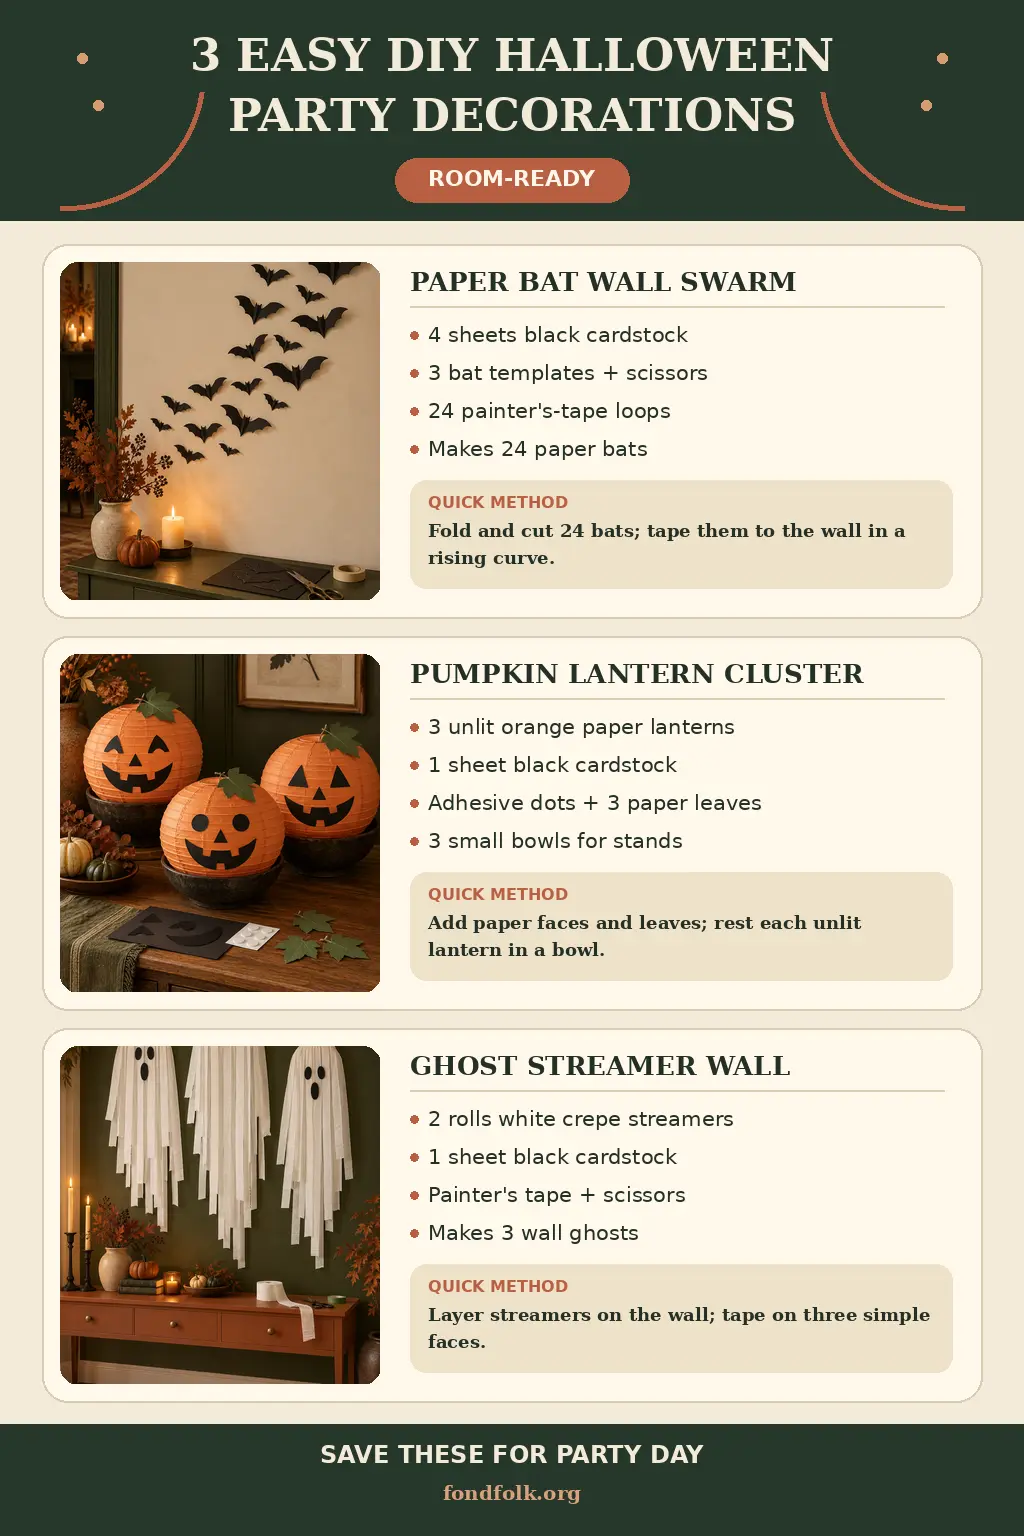
1. Paper Bat Wall Swarm
Folded cardstock gives each bat raised wings, while three sizes keep the arrangement from looking like a row of identical stickers. Twenty-four bats are enough to create a visible curve without covering the whole wall.
Supplies — makes 24 bats
- 4 sheets black cardstock, letter size or A4
- Pencil
- Scissors
- 3 simple bat templates, approximately 3, 4 and 5 inches wide
- 24 small loops of painter’s tape or removable mounting putty
Brief instruction: Fold and cut 24 bats; tape them to the wall in a rising curve.
- Draw or print three simple bat outlines. Keep the body wide enough to fold and use broad wings with only two or three shallow scallops along the lower edge.
- Trace six bats on each sheet, mixing the three sizes. Cut out all 24, then crease each one gently down the center so the wings lift from the wall.
- Put one small tape loop or piece of removable putty behind each folded body. Start low on one side and arrange the bats in a loose curve that rises toward the opposite side.
Place the largest bats near the middle of the swarm and spread the smaller ones toward the ends. Step back after every few pieces; uneven spacing looks more natural than a strict grid. Keep the bats within easy reach rather than climbing on furniture. Test the adhesive first, especially on wallpaper, fresh paint or delicate finishes.
2. Pumpkin Paper Lantern Cluster
Three orange paper lanterns become a reusable pumpkin cluster with removable cardstock faces. Small bowls prevent the round lanterns from rolling and allow the display to stay on a stable table instead of hanging overhead.
Supplies — makes 3 pumpkin lanterns
- 3 unlit orange paper lanterns, approximately 8–12 inches wide
- 1 sheet black cardstock
- 1 small sheet green cardstock
- Pencil and scissors
- 1 pack removable adhesive dots
- 3 small sturdy bowls that cradle the lantern bases
Brief instruction: Add paper faces and leaves; rest each unlit lantern in a bowl.
- Assemble the paper lanterns according to their package directions, but do not add lights. Set each one in a bowl and check that it cannot roll or tip easily.
- Cut two eyes, one nose and one mouth for each pumpkin from black cardstock. Cut three simple leaves from green cardstock.
- Attach the faces and leaves with removable adhesive dots, then group the lanterns at the back of a buffet or on a separate side table.
Use different eye and mouth shapes to make the three pumpkins feel related without being identical. Keep the bowls fully on the table and away from its edge. Paper lanterns are decorations, not serving bowls, and should stay away from candles, hot food, electrical cords and wet surfaces.
3. Ghost Streamer Wall
Layered crepe-paper strips make soft ghost shapes without blocking a doorway. Mount the three ghosts flat against a wall and vary their heights so the group reads clearly from across the room.
Supplies — makes 3 wall ghosts
- 2 rolls white crepe-paper streamers, approximately 80 feet each
- 1 sheet black cardstock
- 1 roll painter’s tape
- Pencil and scissors
Brief instruction: Layer streamers on the wall; tape on three simple faces.
- Cut 30–36 streamer lengths between 24 and 42 inches long. Group them into three bundles, using longer strips for the center ghost.
- Tape the top ends of each bundle to the wall in an overlapping row. Round the upper shape with a few shorter strips and trim the lower ends unevenly.
- Cut six oval eyes and three oval mouths from black cardstock. Tape one face to each streamer bundle, pressing only where the paper is supported by the wall.
Mount the lowest streamer ends at least 12 inches above the floor so guests cannot step on them. Keep the ghosts away from doorways, ceiling fans, vents and open flames. Crepe paper can fade or transfer color if it becomes wet, so use it only on a dry interior wall and remove it carefully after the party.
Arrange all three decorations as one scene
Use the bat swarm as the highest element, place the lantern cluster on a stable surface below or nearby, and put the ghost wall on the opposite side of the room. Repeating black paper across all three projects ties the display together, while the orange lanterns prevent the cream and white pieces from feeling flat.
Build the cardstock pieces a day or two ahead and store them flat. Assemble the lanterns and streamer ghosts on party day, then do one safety pass: press down loose tape, move paper away from heat and make sure every table and bowl is stable.
For the rest of the room, add Fondfolk’s three easy Halloween party hosting stations. When the decorations are ready, choose snacks and alcohol-free drinks from the Halloween party menu.