Plan the buffet before adding decorations
Choose a sturdy table with enough room for guests to set down a plate while serving themselves. Keep the table out of narrow walkways and leave electrical cords, candles and hanging decorations somewhere else. Put plates at the beginning, food in the middle and drinks at the end or on a separate surface to reduce crossing traffic.
The quantities below make one drink chiller, three individual food risers and 12 label cards. Test every container, platter and support before adding food or ice. A Halloween theme should never make the serving setup harder to use safely.
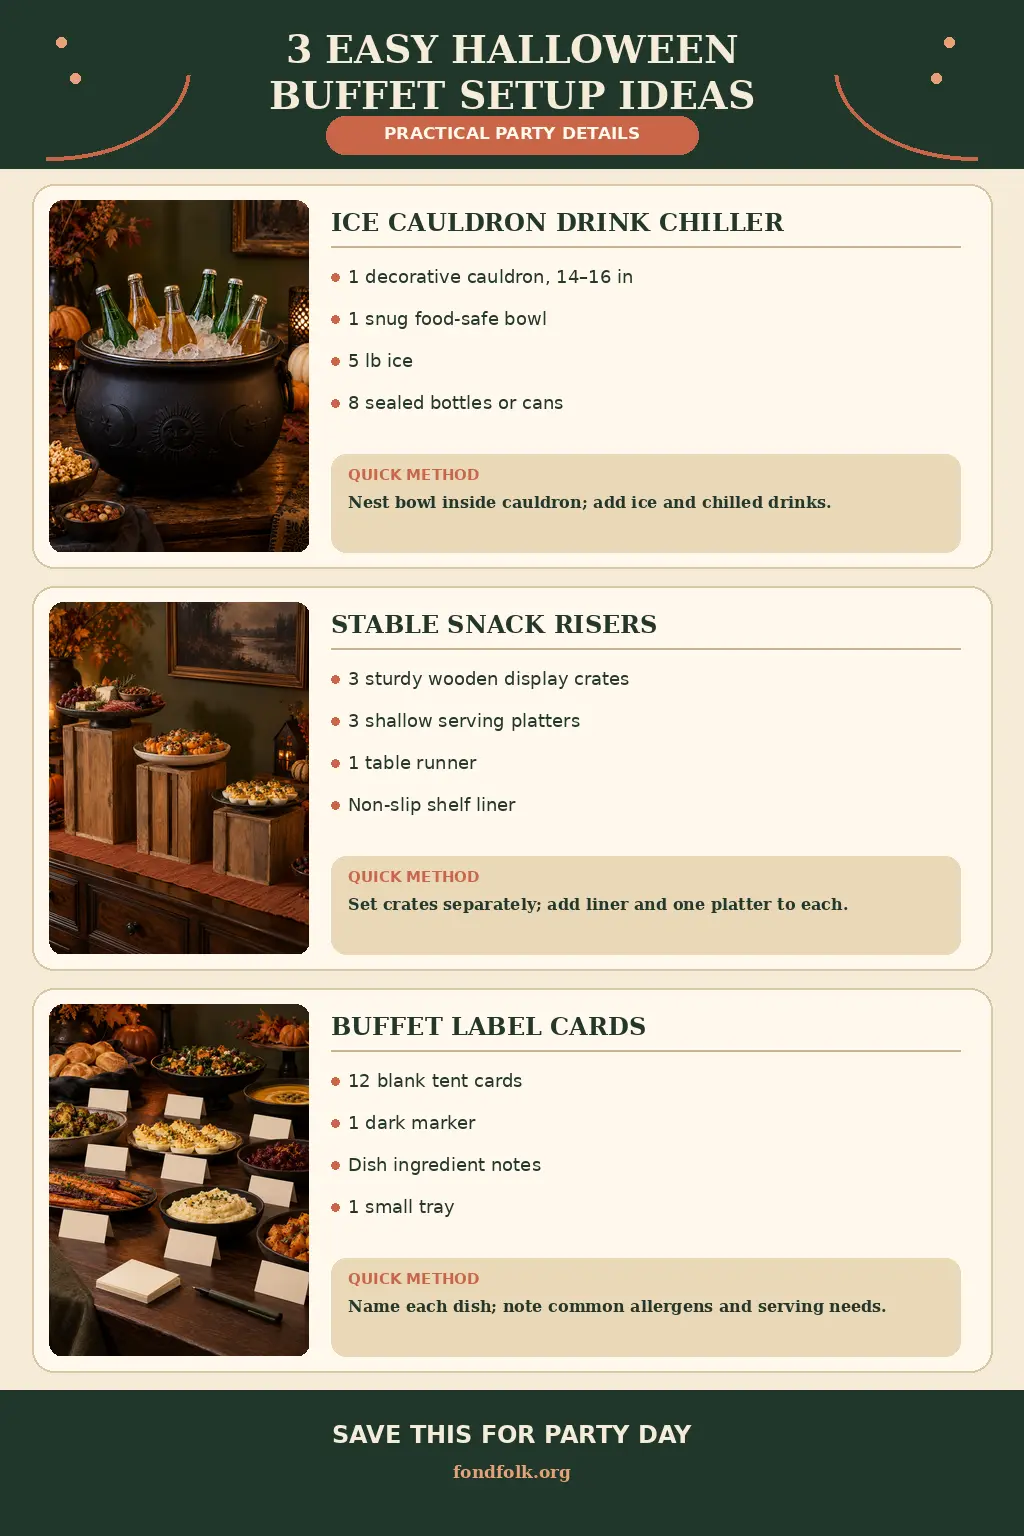
1. Ice Cauldron Drink Chiller
A decorative black cauldron becomes a practical drink tub when a separate food-safe bowl is nested inside. The inner bowl holds the ice and drinks, while the cauldron stays decorative and dry.
Supplies — makes one drink chiller
- 1 decorative cauldron, approximately 14–16 inches wide
- 1 snug food-safe bowl that fits inside the cauldron
- 5 pounds ice
- 8 chilled sealed bottles or cans
- 2 clean dish towels
Brief instruction: Nest the bowl inside the cauldron; add ice and chilled drinks.
- Set the empty cauldron on a sturdy, water-resistant surface away from the table edge. Put one folded towel underneath it to catch condensation.
- Place the clean food-safe bowl inside. Confirm that its rim remains visible and that the bowl cannot rock or slip deeper into the cauldron.
- Add half the ice, arrange eight chilled sealed drinks, then add the remaining ice around them. Keep the second towel nearby for drips.
Use ordinary ice only—no dry ice. Do not put loose ice, drinks or garnishes directly into a decorative cauldron unless the manufacturer specifically identifies it as food-safe. Drain meltwater if the bowl becomes too full, and wipe condensation before it reaches the floor.
2. Stable Snack Risers
Three separate display crates create different platter heights without stacking boxes on top of one another. The raised dishes make a buffet easier to scan while preserving usable table space in front.
Supplies — makes three risers
- 3 sturdy wooden display crates with broad, flat bases
- 3 shallow serving platters with flat bottoms
- 1 table runner
- 1 sheet non-slip shelf liner, cut into three pieces
Brief instruction: Set the crates separately; add liner and one platter to each.
- Spread the runner across the center of the table. Place the three crates separately with their broadest stable face against the table; do not stack them.
- Press down on every corner. If a crate rocks, remove it rather than trying to level it with folded paper or another loose object.
- Put one piece of non-slip liner on each crate and center one shallow platter on top. Add lightweight, room-temperature or chilled snacks only after checking the completed setup again.
Keep the risers several inches from the table edge and leave space between platters for serving utensils. Do not use them for hot pans, heavy beverage dispensers or tall breakable dishes. The platter base should sit completely on the crate rather than hanging over a narrow support.
3. Buffet Label Cards
Simple tent cards help guests match dishes with their names and see important ingredient information. Preparing the wording from packages and recipes is more reliable than trying to remember every ingredient during the party.
Supplies — makes 12 label cards
- 12 blank folded tent cards, approximately 3 × 4 inches
- 1 dark fine-tip marker
- The recipes, packages or ingredient notes for every dish
- 1 small tray for unused cards
Brief instruction: Name each dish; note common allergens and serving needs.
- Write the dish name in large letters across the top of each card. Below it, list any major allergens present and a short note such as vegetarian, contains alcohol or keep chilled when applicable.
- Compare every card with the recipe or original ingredient packaging. Do not guess about a product or mark a dish allergy-safe if cross-contact is possible.
- Place each card directly in front of its matching dish without letting the paper touch food. Keep blank cards and the marker on a small tray for anything added later.
Labels are useful information, not a guarantee against allergens or cross-contact. Keep original packages or a complete ingredient list available, use separate serving utensils and invite guests with allergies to ask the host before eating. Replace any card that becomes wet or moves beside the wrong dish.
Arrange the three ideas as one buffet
Put plates and napkins at the beginning of the table. Arrange the three snack risers behind lower bowls, with the label card for each dish directly in front. Place the ice cauldron at the far end on a separate protected section—or on another sturdy table if the buffet is already crowded.
Walk through the serving direction once before guests arrive. Make sure nobody needs to reach over ice, a tall platter or another guest. Dry the floor, straighten the labels and remove any crate or bowl that feels unstable.
Complete the drink area with Fondfolk’s three alcohol-free Halloween party punches. For additional planning help, use the costume repair, cup marker and take-home treat stations.