Choose the photo spot first
Look for a section of wall with enough open floor space for two or three people to stand comfortably. Avoid doorways, stairs, electrical cords and narrow paths between the food and seating. Natural window light works well during the day; at night, use the room’s ordinary lamps instead of placing hot bulbs or open flames beside paper decorations.
Stand where the photographer will stand and take one test picture before building anything. Check that the full backdrop will fit in the frame and that people will not need to back into furniture. Mark the safe standing area with a rug or a small strip of removable floor tape if the room is busy.
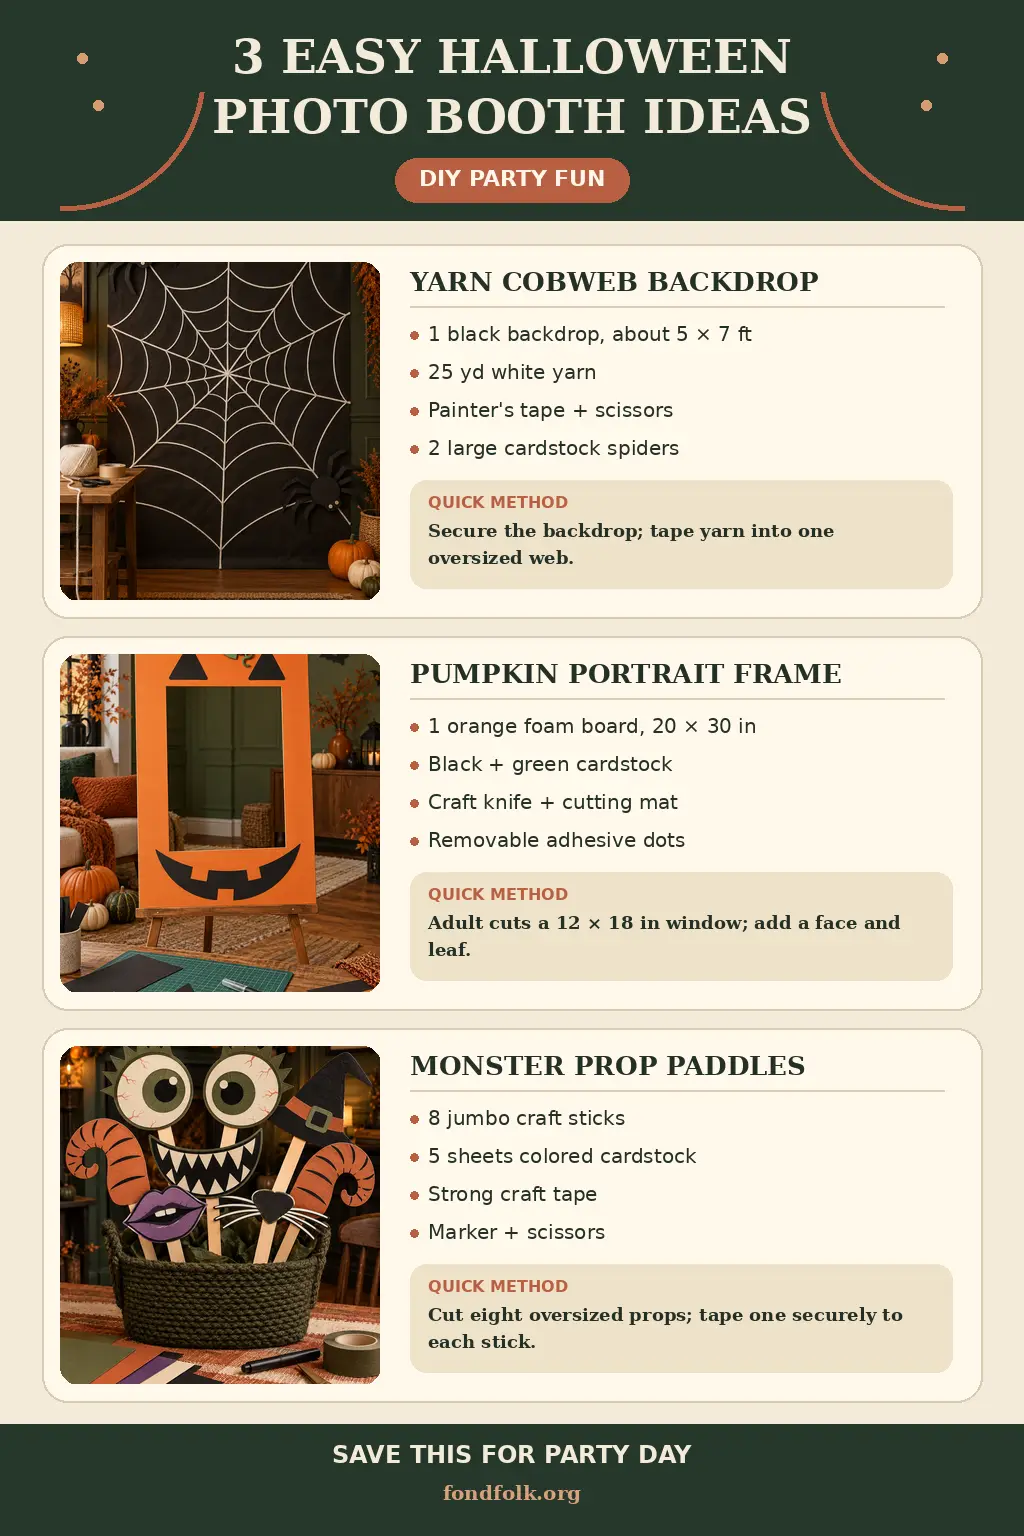
1. Yarn Cobweb Backdrop
A matte black paper backdrop gives the white yarn enough contrast to read clearly in photographs. The web does not need to be mathematically perfect; slightly uneven curved strands make it look handmade rather than printed.
Supplies — makes one backdrop
- 1 matte black kraft-paper sheet or roll cut to approximately 5 × 7 feet
- 25 yards white yarn
- 1 roll painter’s tape
- Scissors
- 2 large black cardstock spiders
Brief instruction: Secure the backdrop; tape yarn into one oversized web.
- Test the painter’s tape on a hidden section of wall. Tape the black paper flat, adding support along the upper edge and both sides so no corner hangs loose.
- Cut eight long yarn strands. Cross them at one central point and run them outward like spokes, taping the ends to the backdrop rather than directly to the wall.
- Add shorter curved yarn pieces between the spokes, working from the center outward. Tape one paper spider near the upper corner and one near the lower opposite corner.
Keep the yarn taut enough to hold its shape but not so tight that it pulls the paper from the wall. Trim or tape away every loose end. The entire backdrop should remain flat against the wall, with nothing trailing onto the floor or extending across a walkway.
2. Pumpkin Portrait Frame
An orange foam-board frame gives guests something to hold or stand behind while keeping faces unobstructed. The black paper eyes and smile stay on the border, leaving the center opening clear for the photograph.
Supplies — makes one frame
- 1 orange foam board, 20 × 30 inches
- 1 sheet black cardstock
- 1 small sheet green cardstock
- Pencil and ruler
- Craft knife and cutting mat
- Removable adhesive dots
Brief instruction: Adult cuts a 12 × 18-inch window; add a face and leaf.
- On the back of the foam board, measure and draw a centered rectangle 12 inches wide and 18 inches tall. Leave a broad border on every side.
- Place the board on a cutting mat. An adult should cut the window with a craft knife, using several light passes rather than forcing the blade through in one stroke.
- Cut two eyes and a wide jack-o’-lantern smile from black cardstock. Cut one large leaf from green cardstock, then attach everything to the frame’s border with adhesive dots.
Cap and store the craft knife immediately after cutting. Check the opening and outer edges for loose paper or rough foam. During the party, let guests hold the lower sides with both hands or place the frame on a stable easel; do not hang it around anyone’s neck.
3. Monster Prop Paddles
Large cardstock features photograph more clearly than tiny novelty props. Eight paddles provide enough variety for a small group without producing a basket of pieces that are difficult to sort.
Supplies — makes 8 prop paddles
- 8 jumbo wooden craft sticks
- 5 sheets sturdy cardstock in black, cream, dark olive, terracotta and purple
- 1 black marker
- Scissors
- Strong craft tape
- 1 stable basket or wide container
Brief instruction: Cut eight oversized props; tape one securely to each stick.
- Draw eight simple shapes: a pair of monster eyes, jagged teeth, curled horns, purple lips, a cat nose with whiskers, a small witch hat and two additional expressions of your choice.
- Cut out the shapes and reinforce any narrow point with a second cardstock layer. Add outlines or details with the marker.
- Tape one jumbo craft stick securely to the back of each shape. Stand the finished paddles in a weighted basket with the handles pointing downward.
Make each paper shape at least 5 inches wide so it remains visible in a group photograph. Check that the sticks are smooth and that no tape edge is lifting. Keep the props away from faces while people are moving, and replace rather than restick anything that becomes loose.
Put the photo booth together
Center the yarn backdrop on the wall and keep the lower edge above the floor. Place the pumpkin frame on one side and the monster props on the other so guests can choose without crossing in front of the photographer. Leave the middle open rather than filling every corner with decorations.
Take another test picture from the planned camera position. Move the props or lamps if they cast strong shadows across faces. A phone tripod can be useful, but a guest taking pictures by hand works just as well; the booth should still make sense without special equipment.
For the surrounding room, pair the photo spot with Fondfolk’s paper bat, pumpkin lantern and ghost streamer decorations. Add three easy Halloween party games in a separate open area so the picture line and play space do not overlap.