This article contains affiliate links. Fondfolk may earn a commission from qualifying purchases. As an Amazon Associate I earn from qualifying purchases.
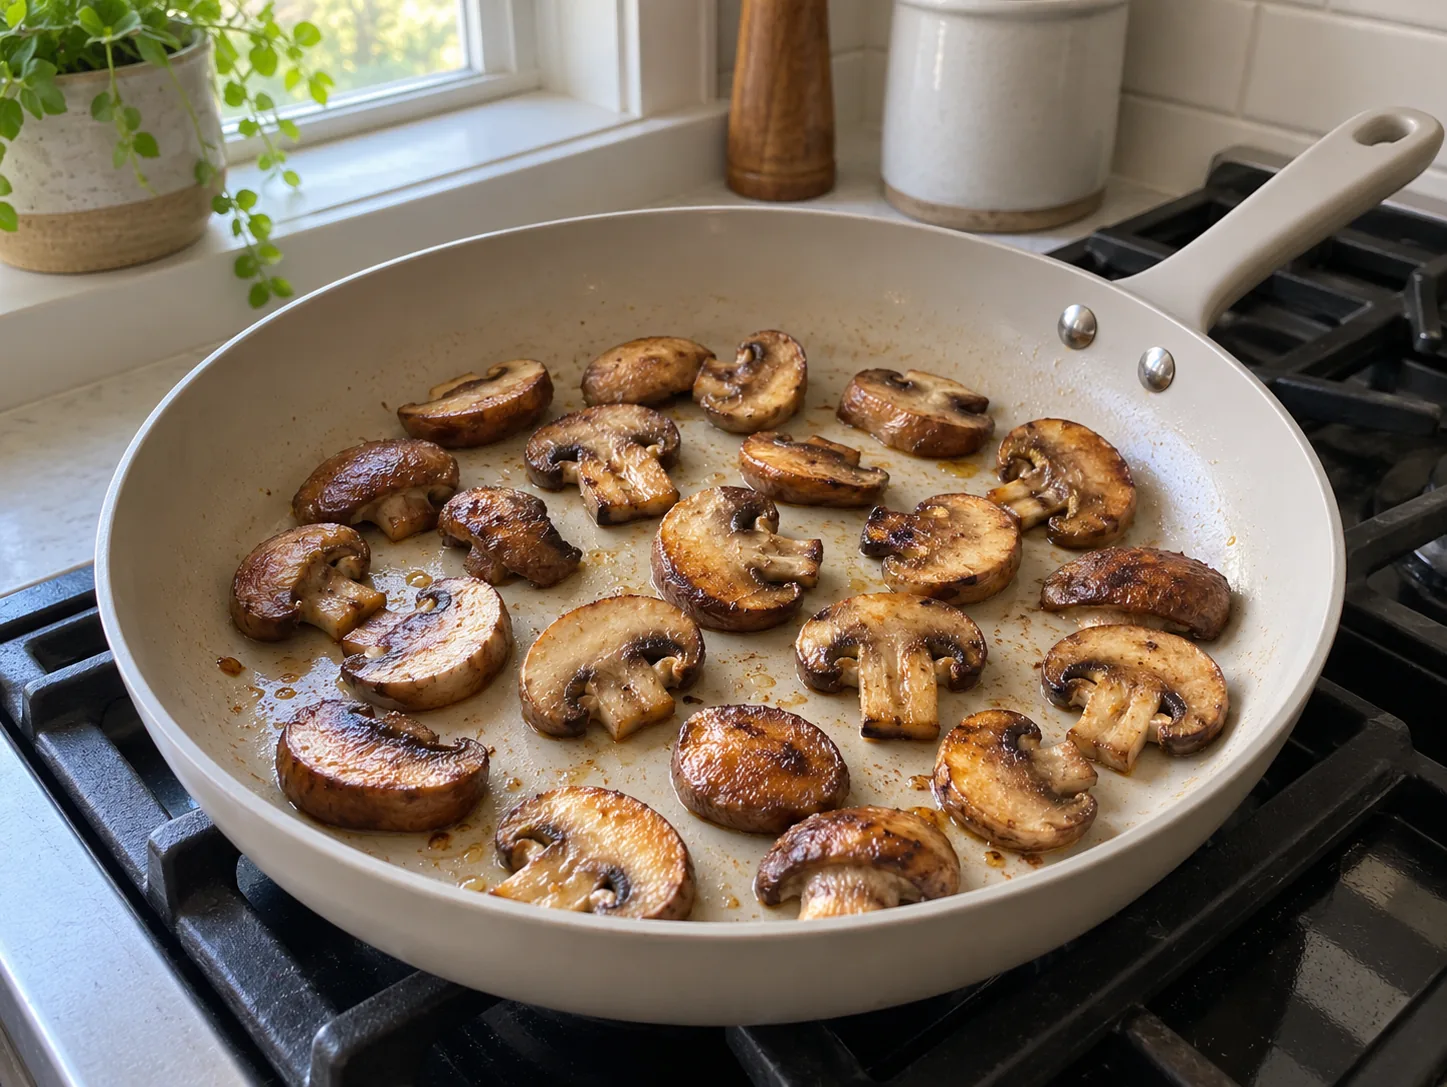
The mushrooms have softened, there is liquid across the bottom of the pan, and none of them has a brown edge. Before turning the burner higher, take some out. Vegetables brown more readily when their surfaces can dry and stay in contact with the pan; a crowded layer keeps releasing water into the same small space.
Start with dry vegetables, a pan wide enough for the batch and heat that suits its cooking surface. Then leave the pieces still long enough to develop color. Those changes usually matter more than buying another bottle of oil.
Separate water on the vegetables from water inside them
Water clinging to freshly washed vegetables goes straight into the pan. Wash them as needed, then drain and dry them before cooking. A colander full of wet broccoli florets may look drained while still holding water in all the small branches. Spread the florets on a clean towel and dry those surfaces too.
Mushrooms and zucchini also release their own moisture as they cook. Drying the outside helps, but it cannot remove the water inside them. That is why pan space matters even when the vegetables were carefully dried.
A little steam is normal. Watch what happens underneath: brief wisps above a sizzling pan are different from pieces sitting in a persistent pool of liquid. The second situation asks the burner to evaporate water while the vegetables continue softening.
Do not press a towel into a hot, oily pan to soak up that liquid. Remove the pan from the heat if you need to stop and reorganize, and use utensils to transfer food safely.
Look at the flat cooking area
A skillet’s advertised diameter usually describes its upper rim, not all the space where food can sit flat. Sloping sides and a smaller base can make two pans with the same stated size hold quite different batches.
Lay the vegetables in a single layer with some gaps. If pieces are stacked, or you have to push them into a heap to turn one over, cook less at once. A wide pan helps only if the burner can heat it effectively; moving an oversized skillet onto a tiny burner can leave a hot center and cooler edges. I recommend the 12.5-inch Our Place Large Always Pan when its size suits your burner and the recipe uses low to medium heat. Its stated diameter is not a promise that the whole base will hold a particular batch.
For mushrooms, I prefer two uncrowded batches to one deep layer. The Mushroom Council’s sautéing guidance also recommends small batches for browning. Have a plate ready for the first batch so you do not end up adding the second on top of it.
The same principle applies in the oven. A rimmed sheet lets food spread out; a small, deep baking dish puts more pieces close together. The sheet-pan guide explains how to judge usable space instead of relying only on a pan’s name.
Use appropriate heat, then give the food time
Follow your pan’s heating instructions and use the amount of oil the recipe needs. For the ceramic-coated Always Pan, add the oil before heating and use low to medium heat; do not heat it empty. Arrange the vegetables once the oil is warm. You should hear them begin cooking when they meet the surface. If the oil is smoking, take the pan off the heat and let it cool before proceeding; smoke is not a target.
Keep the cookware’s limits in view. A ceramic-coated pan is not an invitation to use maximum heat. Our Place’s care instructions for the Large Always Pan call for low to medium heat, oil in the pan and wood or silicone utensils. Follow the directions for the exact pan you own, including how to preheat it. A burner number is not a universal temperature across different stoves.
I prefer a broad silicone tool such as the GIR Ultimate Turner for lifting vegetables from a coated surface. Keep it away from open flames and heating elements, and set it aside between uses.
Once the vegetables are arranged, resist constant stirring. Lift one piece to inspect its underside before turning the whole batch. A broad cut face has a chance to brown when it stays against the pan; moving it every few seconds interrupts that contact.
The Mushroom Council’s preparation guide uses that sequence: one layer, brown the first side, then turn. The point here is the contact and order, not applying its high-heat instruction to cookware whose manufacturer advises otherwise.
Match the cut to the vegetable
Pieces that look equally large do not always cook at the same pace. A thick carrot coin and a slice of zucchini ask different things of the pan. Give dense vegetables a suitable head start or cook them separately, then combine them near the end.
Cut within each vegetable consistently. For broccoli, split particularly thick stem sections and large florets so they do not lag far behind the smaller pieces. For zucchini, choose pieces thick enough to turn without collapsing rather than a mixture of thick chunks and paper-thin ends.
A wetter cooking stage can be useful when it is intentional. Oregon State’s Sesame Broccoli starts with a brief sauté, then adds a sauce containing water and cooks until the broccoli is tender. Follow that recipe’s sequence rather than trying to brown a thick stem dry until its outside scorches. A bright, tender vegetable does not need a dark crust to belong on the plate.
Frozen vegetables need their own recipe instructions. Surface ice and thawed liquid change the cooking job, so do not assume a method written for dry, fresh pieces works unchanged. Use a recipe written for the frozen ingredient, including whether to cook from frozen or thaw and drain it first.
What to do with the pan you have now
If your vegetables are already watery, look at their tenderness before spending another ten minutes trying to brown them. A soft zucchini will not become firm again just because its water evaporates.
| What is happening | A useful next move |
|---|---|
| Firm vegetables are sitting in liquid | Remove some to a plate, leave the lid off and let the smaller batch cook. Return the reserved vegetables as a separate batch. |
| The vegetables are tender but pale | Serve them as a softer side, or use them in a soup or sauce. Next time, reduce the batch before cooking. |
| One area burns while another stays wet | Lower the heat as needed and rearrange the food. Match the pan to the burner rather than increasing the heat across the board. |
| Pieces stick before they brown | Let them cook a little longer, then ease a surface-safe turner underneath. Inspect the heat and oil rather than scraping aggressively. |
| Sauce is pooling around the vegetables | Let the recipe’s sauce stage finish as directed. For a browned result next time, do the browning before adding a liquid sauce. |
Avoid adding every extra ingredient at once. Garlic can burn while a thick vegetable is still cooking; a splash of broth or soy sauce turns the next stage into a wetter job. Follow the recipe’s order, and add a lemon squeeze at the table when you want to preserve the browned surface for serving.
There is no universal rule that vegetables must never be salted before cooking. Follow the recipe’s seasoning sequence. Crowding, surface water and contact are more useful things to diagnose than blaming a pinch of salt for every pale pan.
Make two batches feel like one dinner
Prepare the whole quantity before starting, then divide it by what the pan can comfortably hold. Keep the second batch off the heat while the first cooks. Transfer the first batch to a plate, cook the second and combine them briefly at the end if the recipe calls for serving them together.
Do not cover the first batch tightly when you are trying to preserve its browned surface. Keep the wait brief, and finish the rest of the meal before starting a vegetable that needs immediate attention. Put the last pan on your cooking timeline before you start.
For a practical follow-through, use the same attention to dryness and spacing in crisp roast potatoes, or brown mushrooms before building mushroom gravy. Once the gravy’s broth goes in, browning is finished and the sauce has a different job to do.
Choose the batch size before turning on the burner
Spread the cut vegetables in the cool pan as a capacity check, then remove them before preheating if the method calls for a preheated pan. If they already form a deep pile, divide them into batches now. This is easier than trying to remove half a hot, watery mixture while the rest of dinner is underway. Keep each batch’s vegetables at a similar stage of preparation.
Use a wide plate or tray for the briefly waiting cooked batch. A deep bowl with a tight cover traps more of the steam you are trying to manage. Keep the wait short and follow safe holding guidance if the meal is delayed; an uncovered plate is a texture choice, not a way to keep food safe indefinitely.
Decide what success looks like for this dinner
Browning is useful when it belongs to the dish, but not every vegetable needs a dark surface. A tender pan of vegetables can still become a good side or part of a soup. Before adding more oil or more time, ask whether the pieces have already reached the texture you want to eat. Extra cooking cannot restore a soft piece’s original structure.
For the next attempt, change one practical variable: fewer pieces, a more consistent cut or better surface drying. Keep the seasoning and vegetable amount written down so you can understand the difference. A repeatable dinner comes from noticing what the pan can handle, not from turning the burner higher whenever the result is pale.