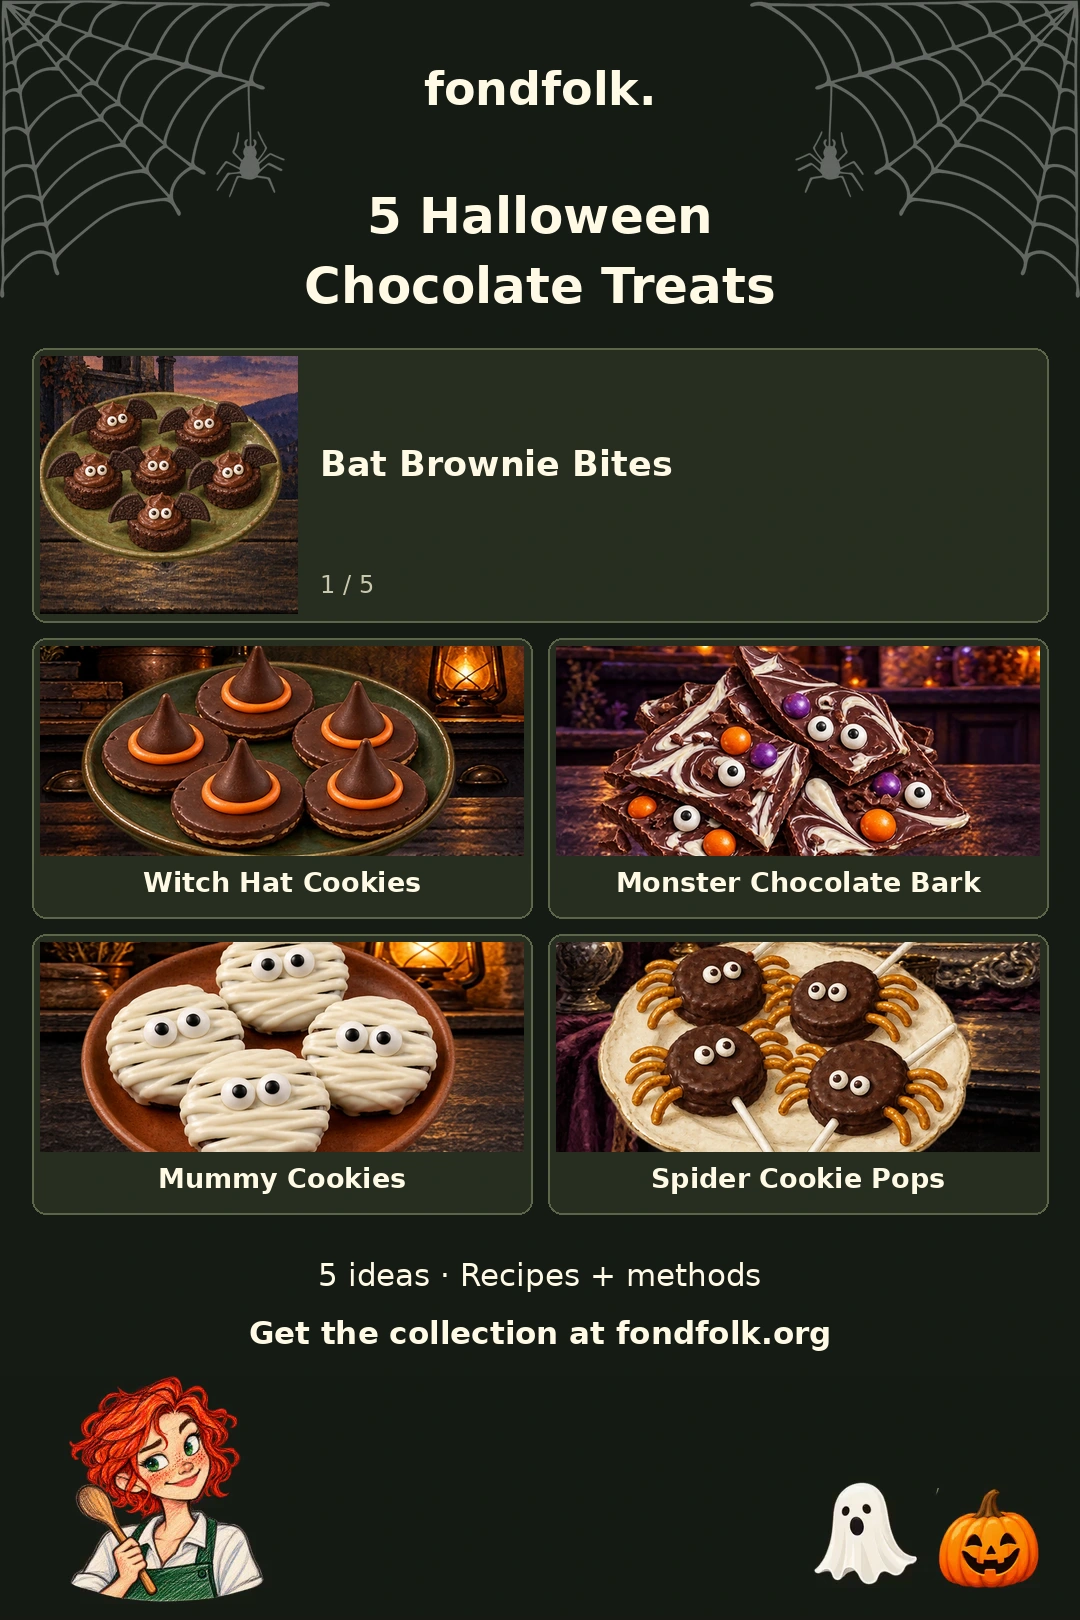
Ready-baked brownies and sandwich cookies become bats, witches’ hats, mummies and spiders, while a tray of swirled chocolate becomes monster bark. These five Halloween chocolate treats are assembly and decorating projects rather than five separate cakes. Pick the finish you like, then allow the chilling or setting time in the matching recipe.
Choose your recipe and set up
Clear a flat tray-sized space in the refrigerator before starting a chilled recipe. Set the toppings beside the tray, and keep bowls and utensils dry for melting chocolate. Read the full method before opening the cookies: bat wings use wafer halves, while spider pops need the filling to hold the stick and pretzel legs.
1. Bat Brownie Bites
12 bats · 25 minutes
Ingredients
- 12 ready-baked brownie bites
- 6 chocolate sandwich cookies
- 1/4 cup chocolate frosting
- 1 tbsp candy eyes
Method
- Set the brownie bites on a tray. Twist each cookie apart, then carefully cut each wafer in half to make 24 wing pieces. Leave any filling attached; it can face the brownie.
- Spread about 1 teaspoon frosting over each brownie. Press two cookie half-wafers into the frosting, with the curved edges pointing outward like wings.
- Attach two candy eyes to the front of each brownie using a dot of frosting. Refrigerate for 10 minutes to firm the frosting before serving.
The brownies are ready-baked bites. Six sandwich cookies separate into twelve wafers, which are halved into twenty-four wing pieces. Each of the twelve bats receives two wings. Chill the assembled bats for ten minutes to firm the frosting.
2. No-Bake Witch Hat Cookies
12 cookies · 15 minutes
Ingredients
- 1 dozen chocolate-covered round cookies
- 1 dozen chocolate kisses, unwrapped
- 1/4 cup orange decorating icing
Method
- Set the cookies on a tray with their chocolate-covered sides facing up. Unwrap the chocolate kisses.
- Spoon the icing into a small piping bag. Pipe a small ring around the center of each cookie, using about 1 teaspoon per cookie and keeping a little icing for touch-ups.
- Press one chocolate kiss onto each icing ring. The visible icing around its base makes the hat band. Touch up gaps with the remaining icing.
- Leave the cookies flat for 5 minutes before moving them. Store in one layer in an airtight container in a cool room; follow the icing label if it requires refrigeration.
The orange icing ring does two jobs: it attaches the chocolate kiss and makes the visible hat band. Keep a little icing for touch-ups and let the hats rest flat for five minutes before moving them.
3. Monster Chocolate Bark
12 pieces · 40 minutes
Ingredients
- 250 g semisweet chocolate, chopped
- 60 g white chocolate, chopped
- 1/4 cup candy-coated chocolate pieces
- 1 tbsp edible candy eyes
Method
- Line a baking tray with parchment. Melt the semisweet chocolate in a dry microwave-safe bowl in 20-second bursts, stirring between bursts until smooth. Melt the white chocolate separately at 50% power in short bursts.
- Spread the semisweet chocolate into a rectangle about 20 x 25 cm. Spoon the white chocolate over it in short streaks and gently swirl with a skewer.
- Scatter over the candy-coated chocolates and edible eyes. Press them lightly into the chocolate.
- Chill for about 25 minutes until firm. Break into about 12 pieces. Store airtight in a cool place or refrigerate if the room is warm.
Melt the semisweet and white chocolate separately, following the different power instructions. Keep the bark close to the written twenty-by-twenty-five-centimeter rectangle so the coating and toppings are distributed as intended.
4. Mummy Sandwich Cookies
12 cookies · 35 minutes
Ingredients
- 1 dozen chocolate sandwich cookies
- 250 g white candy melts
- 1 tbsp edible candy eyes, for decorating
Method
- Line a tray with parchment. Melt the white candy melts according to the package instructions. Reserve about one-quarter of the melted coating for drizzling.
- Dip each cookie into the remaining coating. Lift out with a fork, tap away the excess and set on the parchment. Chill for about 10 minutes until firm.
- Gently rewarm the reserved coating if needed. Drizzle thin zigzags across each cookie to make bandages. Add two edible eyes while the drizzle is wet; you may not need all the eyes.
- Chill for about 10 minutes more until fully set. Store in an airtight container in a cool place.
Reserve about one-quarter of the melted coating before dipping the cookies. That reserved portion makes the bandages after the first coating sets. Add the eyes while the drizzle is still wet.
5. Spider Cookie Pops
8 pops · 35 minutes
Ingredients
- 8 double-filled chocolate sandwich cookies
- 100 g semisweet chocolate, chopped
- 32 thin pretzel sticks, halved
- 1 tbsp candy eyes
Method
- Line a tray with parchment and set out 8 food-safe paper lollipop sticks. Melt the chocolate in short microwave bursts, stirring until smooth.
- Carefully twist each cookie open. Press a lollipop stick into the filling, then arrange four pretzel halves on each side as legs. Spoon a little melted chocolate over the stick and inner ends of the pretzels, replace the cookie lid and chill for 10 minutes.
- Lay the pops flat. Spread the remaining melted chocolate thinly over the cookie tops and attach two candy eyes to each. Chill for 15 minutes, until firmly set, before lifting by the sticks.
Each spider has four pretzel halves on each side. Thirty-two whole pretzel sticks become sixty-four halves for eight spiders. The first chill secures the inner structure; the final chill sets the chocolate tops before you lift them by their sticks.
Plan the serving order
For a short decorating session, choose witch hats. For a tray you can break into pieces, choose bark. Bats and mummies suit individual portions, while spider pops need more careful assembly. Keep finished pieces in one layer where the recipe calls for it, and follow the ingredients’ storage directions as well as the recipe. Label the actual ingredients you used rather than assuming every cookie or coating has the same allergens.
Optional tools for these recipes
These are optional equipment links. Use suitable items you already have. We may earn a commission from qualifying purchases made through these links. As an Amazon Associate, Fondfolk earns from qualifying purchases.
Parchment helps release the bark, dipped mummy cookies and chocolate-coated spider pops from their trays. King Arthur Half-Sheet Parchment. Rated by the maker to 450°F. Keep inside the tray and away from heating elements; no broiler use.
Browse piping bags and tips for the narrow orange icing rings on witch hats. Choose a small opening; a wide cream tip does a different job. Compare piping bags and tips. Choose the tip for the shape in the method; keep bags and tips clean and dry as appropriate.
Browse edible candy eyes for bats, bark, mummies and spiders. Check the pack’s ingredients and choose eyes that fit the small treats. Compare edible candy eyes. Check ingredients, allergens and intended serving age; decorative pieces must be edible.
Browse offset icing spatulas for spreading brownie frosting or the bark layer. A small suitable spatula you already own can do the same work. Compare offset icing spatulas. Match blade length to the cake and work surface.